Connecting your app running in the browser to your desktop app
Your desktop app can start a local WebSocket server, allowing applications running in the browser to communicate directly with it. By opening a server on a specific port, your web application can establish a real-time connection to the desktop app running on the user's machine.
Once connected, the browser and desktop app can exchange messages and trigger actions.
This makes it possible for a web-based application to interact with desktop features such as local files, system information, or other capabilities that are not normally available in a standard browser environment.
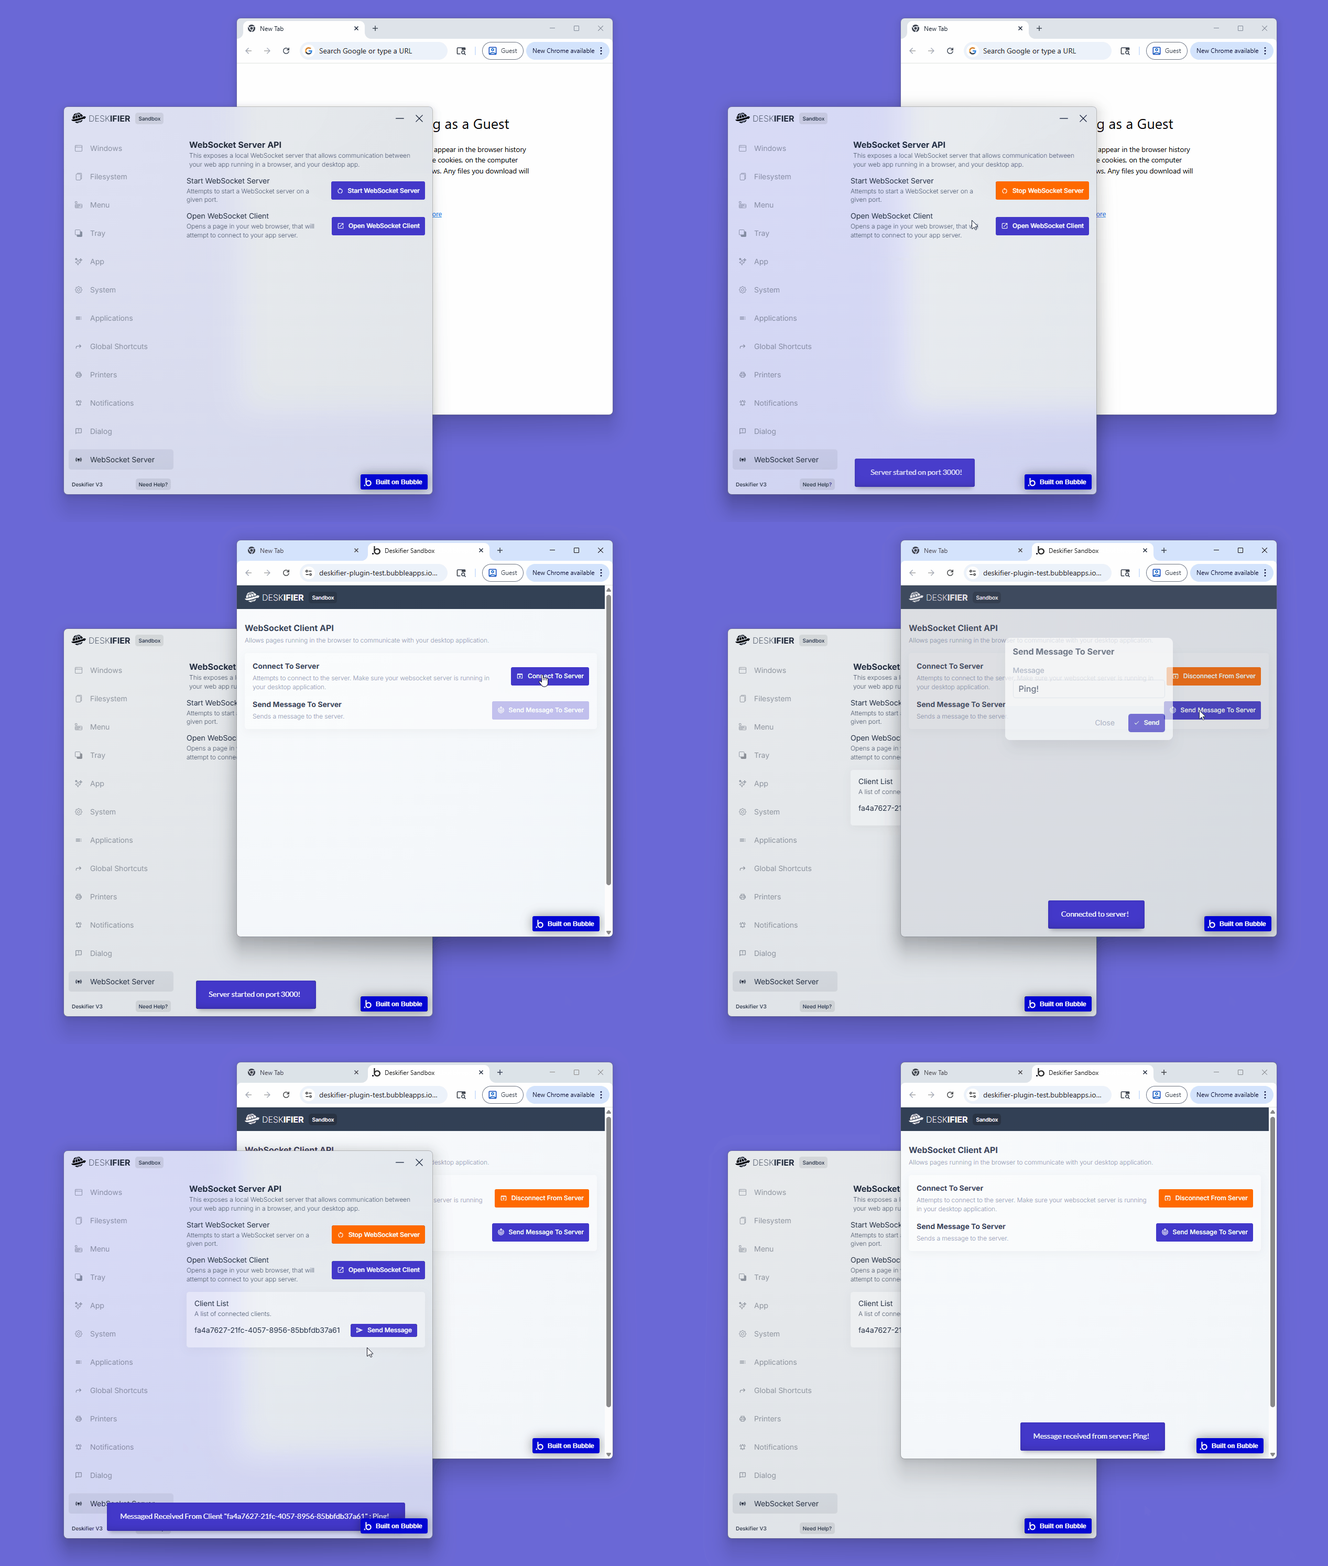
How To:
View this example in the Bubble editor:
https://bubble.io/page?id=deskifier-plugin-test&tab=Workflow&name=sandbox&type=page&wf_item=bTNwL
Step 1.
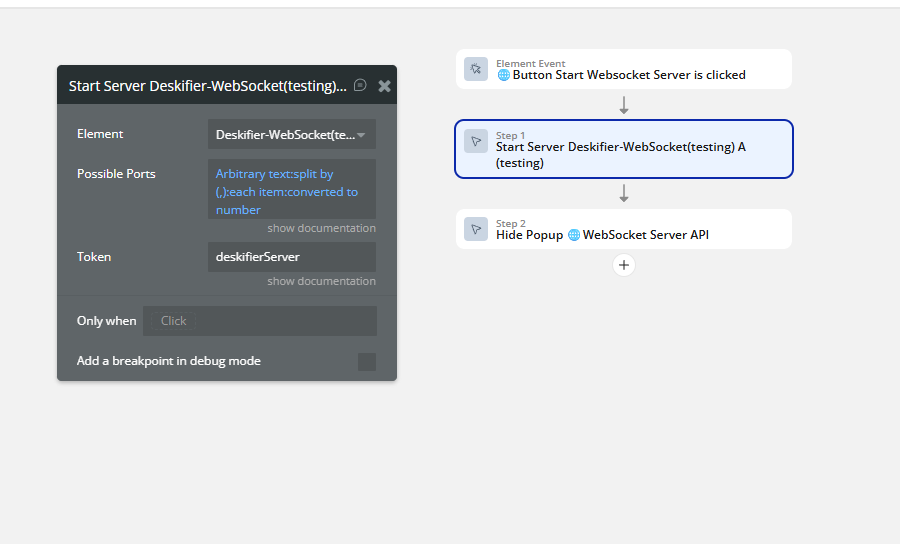
The first step, is to start running our server in our desktop app. This opens up a local server that will manage incoming local connections. To do this, we must specify a port to listen on.
You can specify multiple ports that will be attempted to start on. The first available will be used.
Additionally, we must specify a token to use that will be used to authenticate clients before connecting.
Step 2.
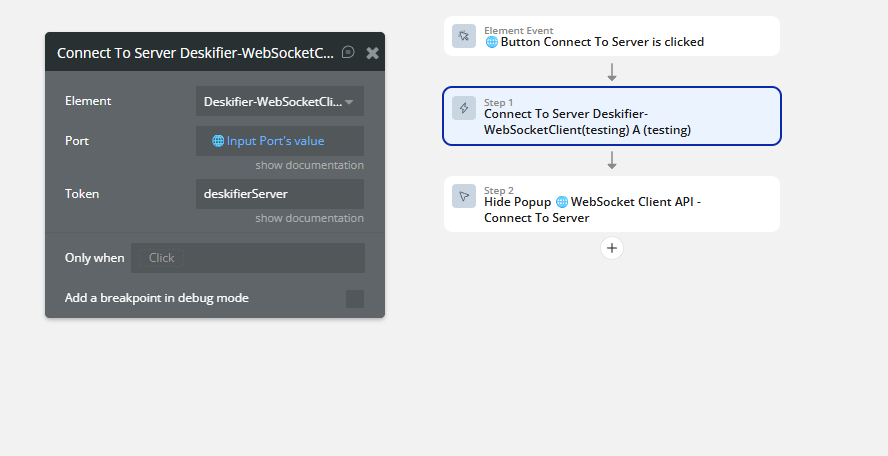
Once our server is running (use the Server Failed To Start event to catch errors while starting), we can then connect to it using the WebSocket Client Element.
In our browser, we'll run the Connect To Server action.
Step 3.
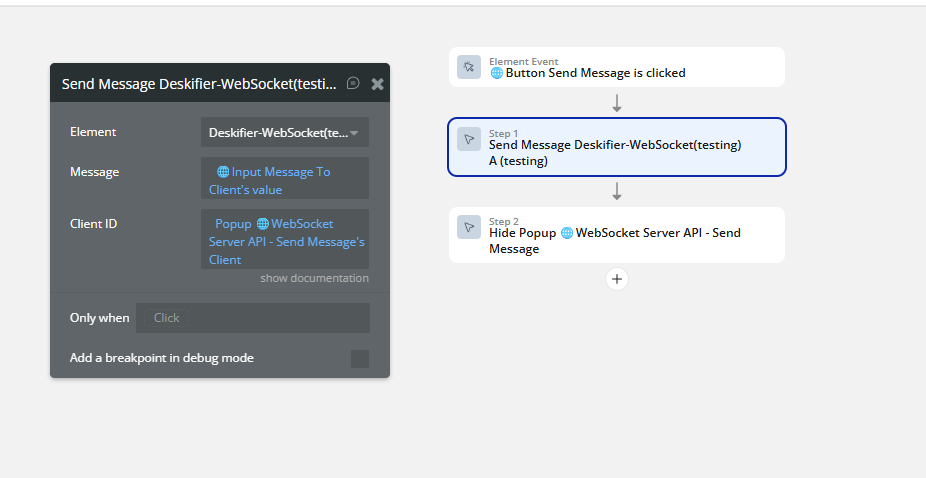
Once our client is connected, the Client Connected event will fire, and the Connected Client IDs state will be updated.
We can then send a message to our new client with the Send Message action.