Microsoft Azure Trusted Signing
Set up Azure Trusted Signing
To sign Windows builds with a Microsoft-issued certificate, Deskifier needs credentials from Azure Trusted Signing. This guide walks you through creating a signing account, verifying an identity, and generating the app credentials Deskifier uses to sign your builds.
- Navigate to azure.microsoft.com/products/artifact-signing and click Get started with Azure.
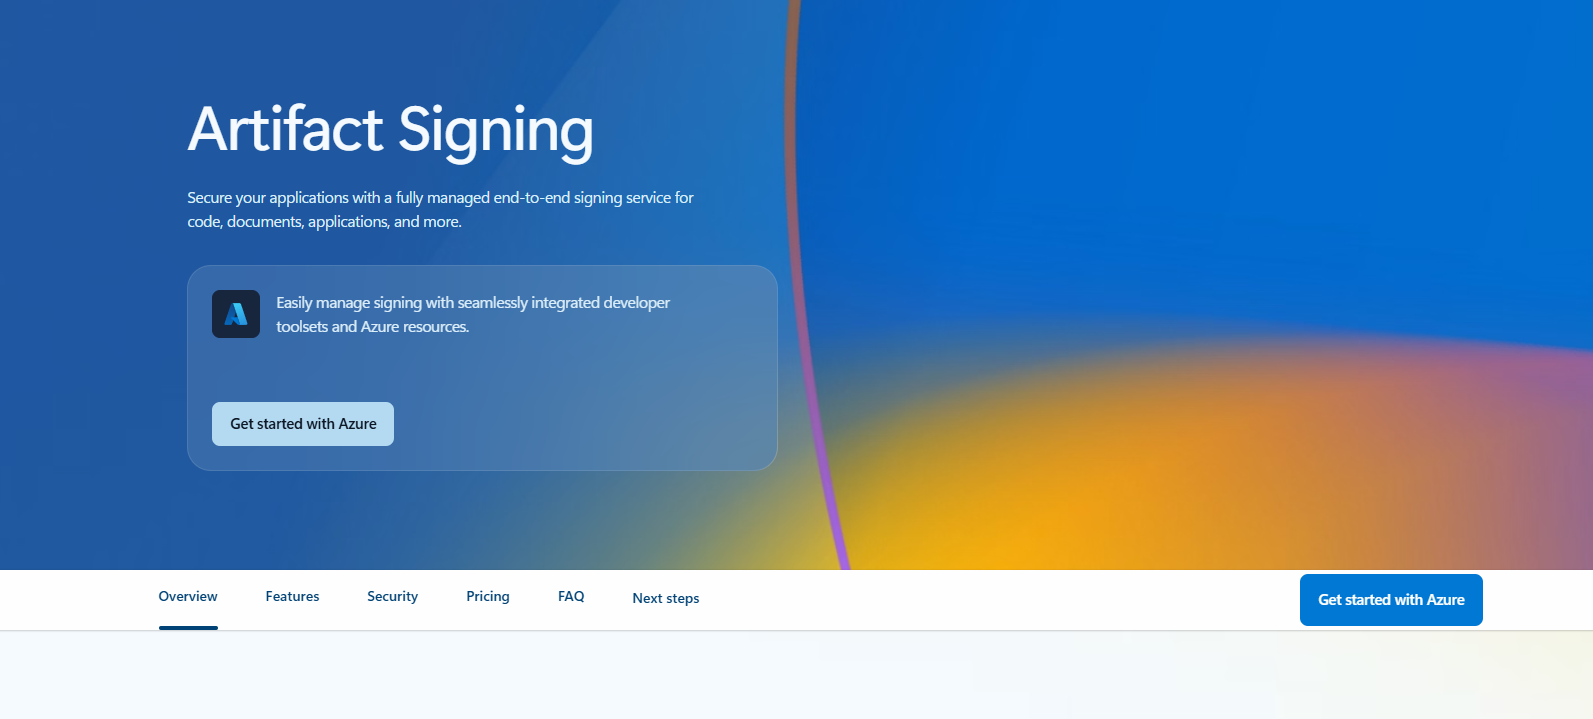
<figure><img src="https://content.gitbook.com/content/aEnaAl6e7qhRH1HWZmjS/blobs/WufGwhLwCUGZtqDeqiXe/image.png" alt="Get started with Azure Trusted Signing"></figure>
- After signing up or logging in, navigate to the Artifact Signing Accounts service in the Azure portal.
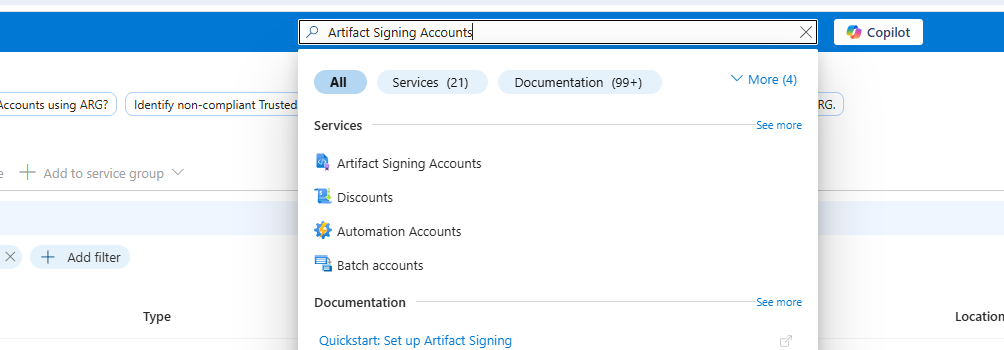
<figure><img src="https://content.gitbook.com/content/aEnaAl6e7qhRH1HWZmjS/blobs/cqgUb8tLBFurwqS286vY/image.png" alt="Artifact Signing Accounts"></figure>
- Click Create and enter a resource group name (recommended:
<appName>Resource).
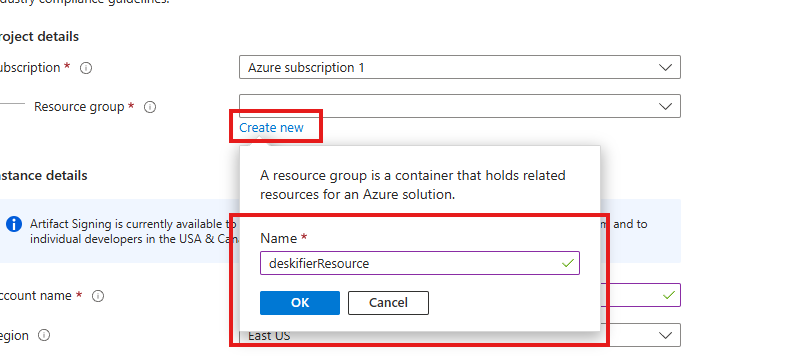
<figure><img src="https://content.gitbook.com/content/aEnaAl6e7qhRH1HWZmjS/blobs/GEpGwgjAOv2N3FIqOvlG/image.png" alt="Create resource group"></figure>
- Select an account name & pricing plan (recommended:
<appName>Account). Take note of the Account name — you'll enter it in the Deskifier dashboard as Azure Signing Account Name.
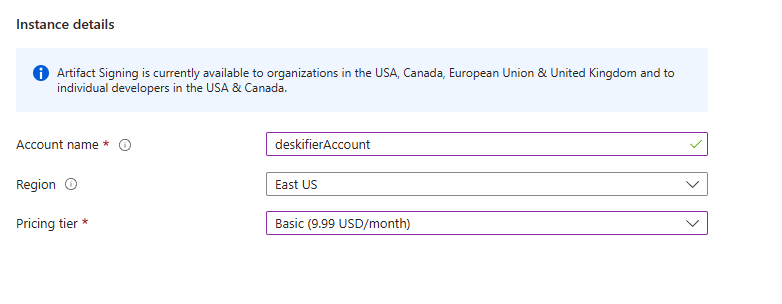
<figure><img src="https://content.gitbook.com/content/aEnaAl6e7qhRH1HWZmjS/blobs/jGe5z7aGI1GYR4pRvEaK/image.png" alt="Select signing account name"></figure>
- Once inside your new signing account, navigate to Access control (IAM) to set account permissions.
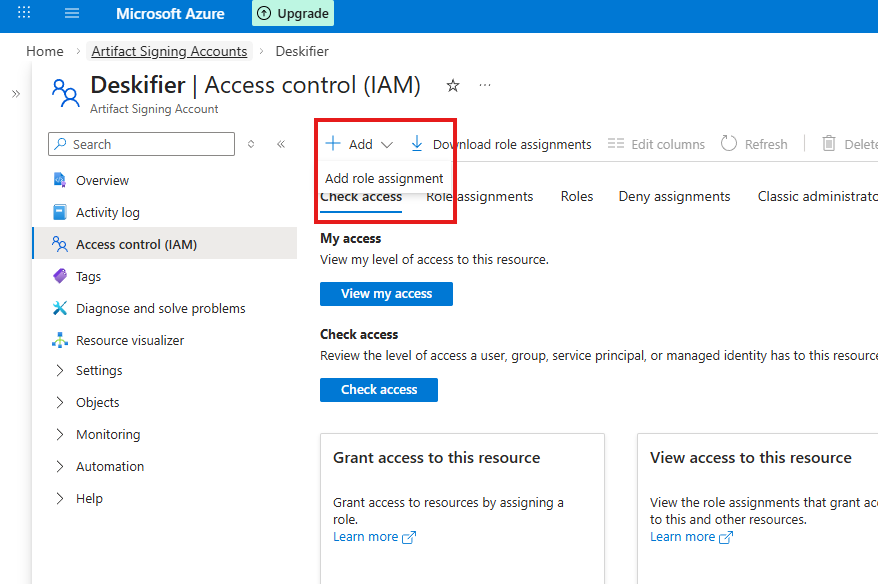
<figure><img src="https://content.gitbook.com/content/aEnaAl6e7qhRH1HWZmjS/blobs/TS4mTaEcGsQHkhf06Zcf/image.png" alt="Access control (IAM)"></figure>
- Search for "Artifact Signing Identity Verifier" and select it.
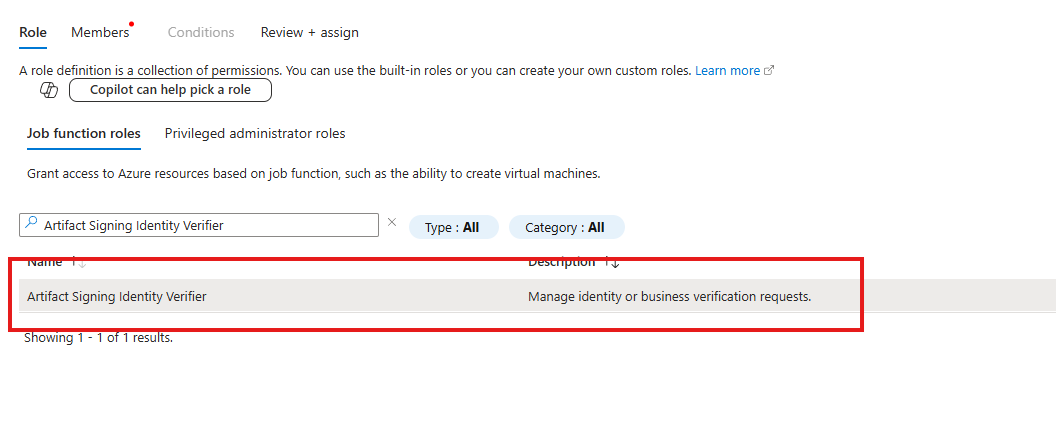
<figure><img src="https://content.gitbook.com/content/aEnaAl6e7qhRH1HWZmjS/blobs/SwVqf2CNgJJtYsn59ZQS/image.png" alt="Artifact Signing Identity Verifier role"></figure>
- Select your user account under "Members".
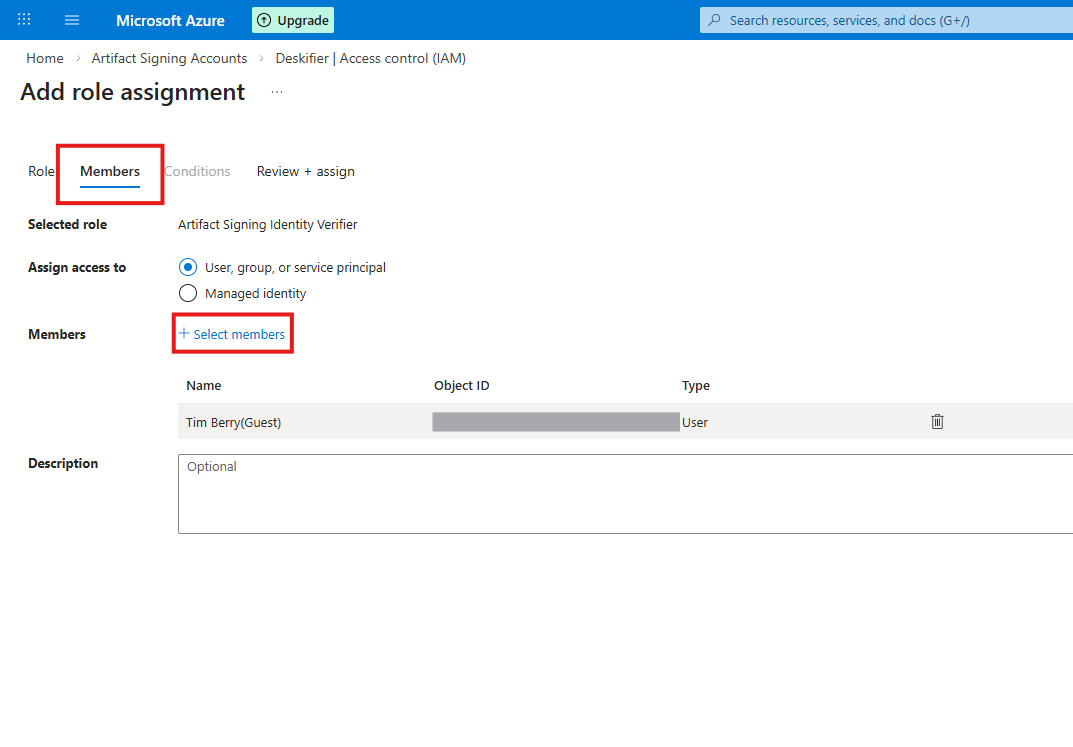
<figure><img src="https://content.gitbook.com/content/aEnaAl6e7qhRH1HWZmjS/blobs/JnAyfI8FKSwDBVVnXlMT/image.png" alt="Select your user as Member"></figure>
- Once you've selected the role and your account, click "Review + assign". Then go to "Overview" and click "Identity validation".
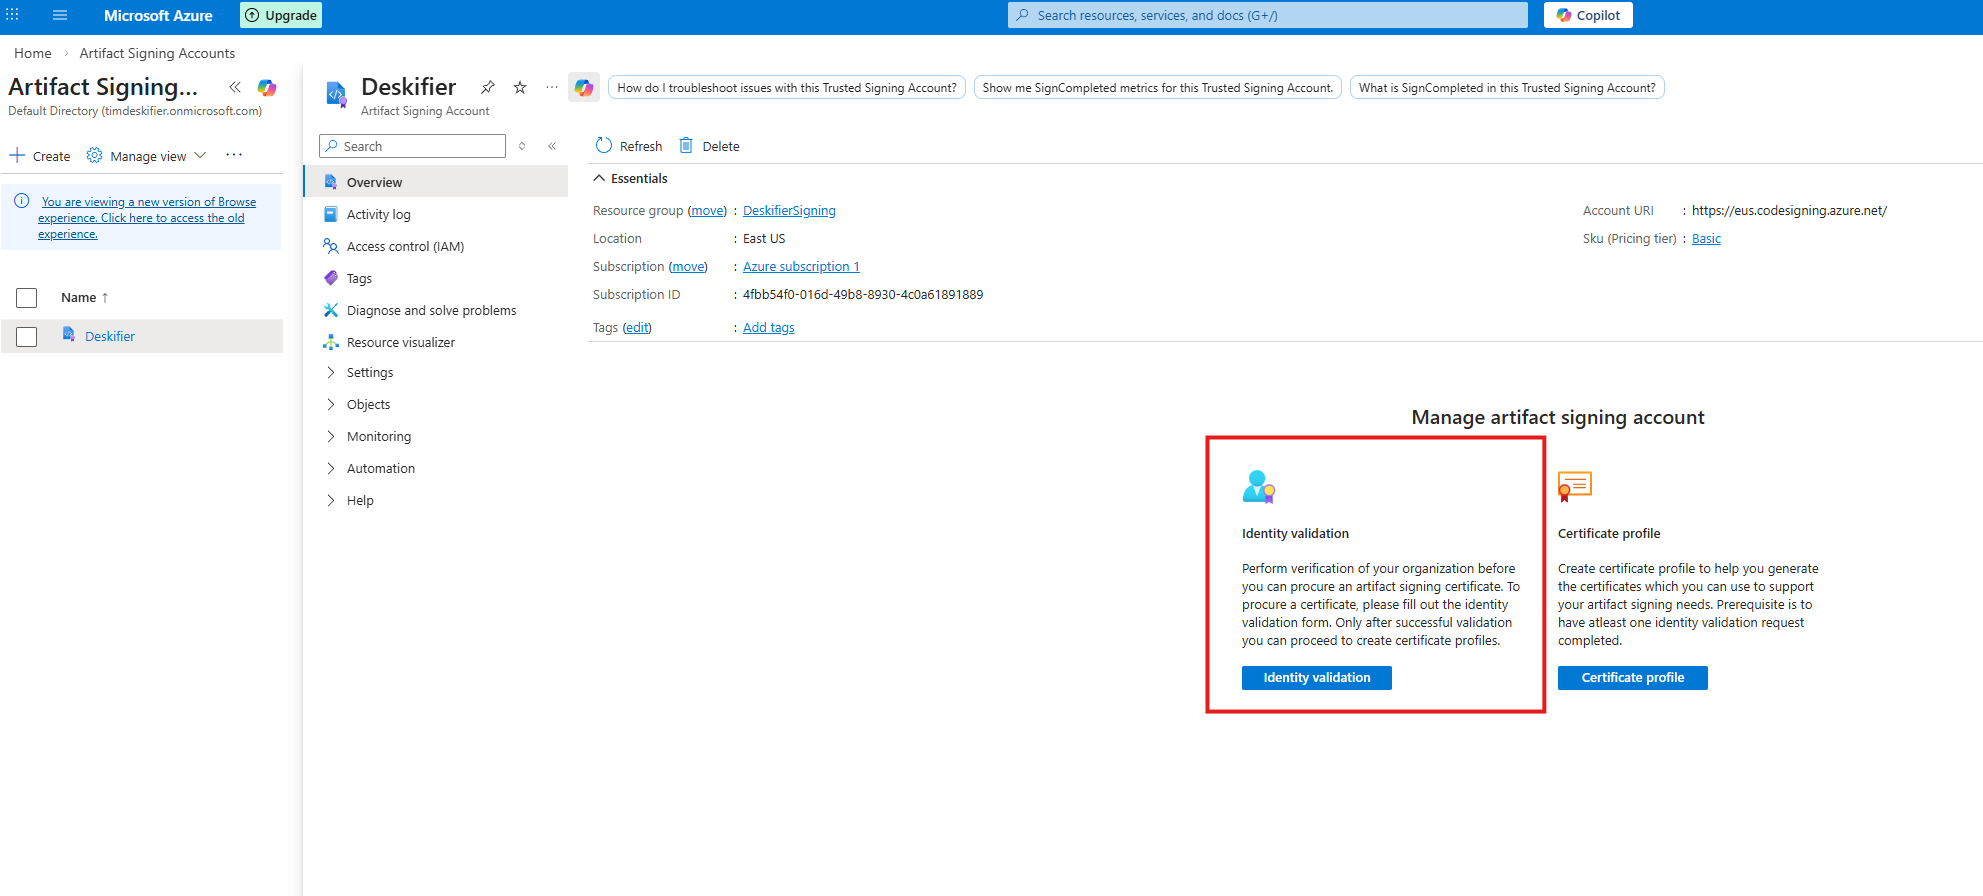
<figure><img src="https://content.gitbook.com/content/aEnaAl6e7qhRH1HWZmjS/blobs/Jeywmq0ROVKvBZbLyytU/image.png" alt="Identity validation"></figure>
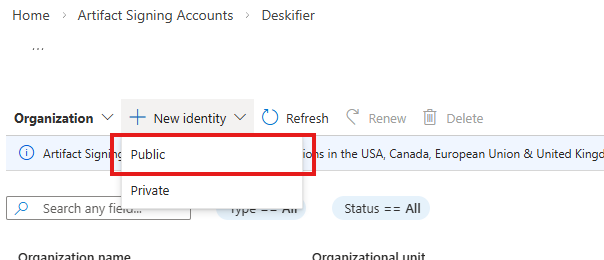
- Click New identity → Public.
<figure><img src="https://content.gitbook.com/content/aEnaAl6e7qhRH1HWZmjS/blobs/fF0ffyzWUhumMzi0SJK4/image.png" alt="New identity → Public"></figure>
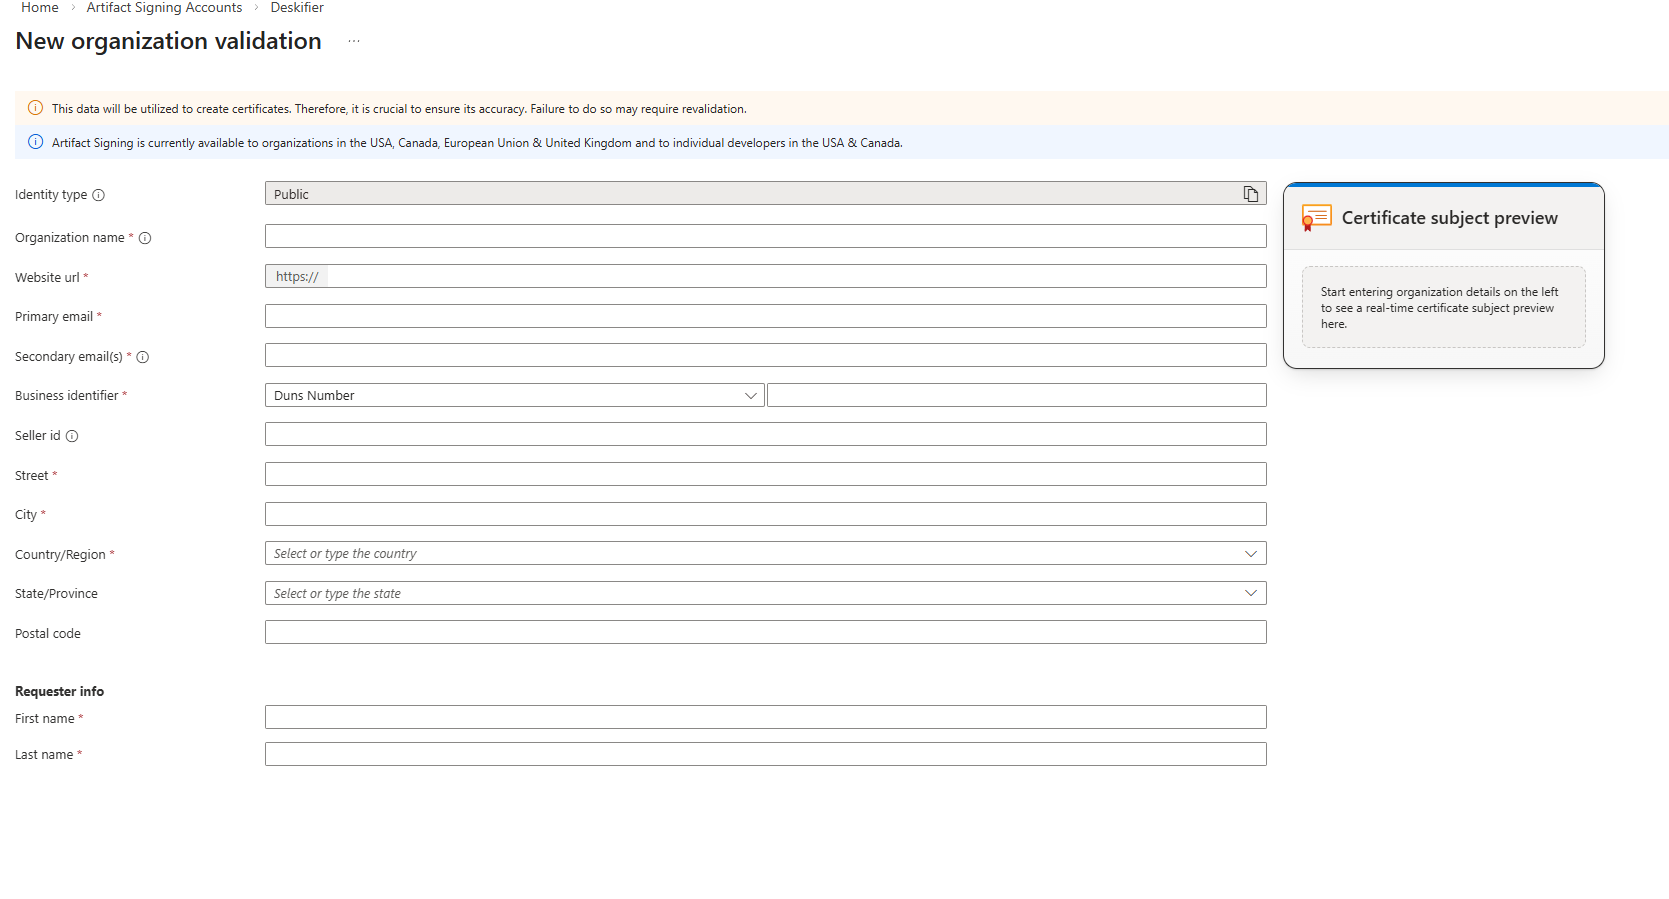
- Enter all details as required.
<figure><img src="https://content.gitbook.com/content/aEnaAl6e7qhRH1HWZmjS/blobs/vettFeK50UotbE0h3NqN/image.png" alt="Identity request details"></figure>
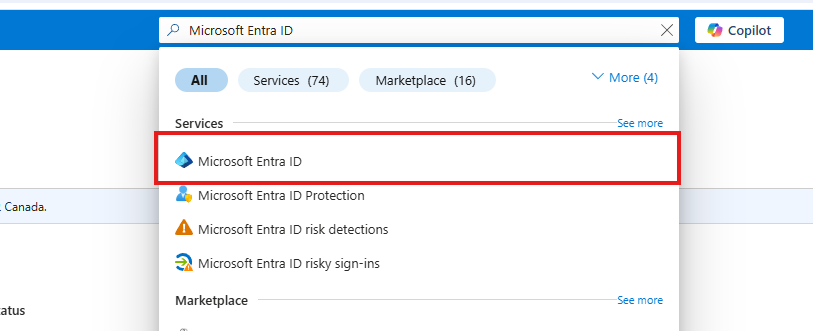
- Your identity is now pending verification. In the meantime, we can move on to the next step. Search for "Microsoft Entra ID".
<figure><img src="https://content.gitbook.com/content/aEnaAl6e7qhRH1HWZmjS/blobs/9WER6g8QUrqk386LUuf7/image.png" alt="Microsoft Entra ID"></figure>
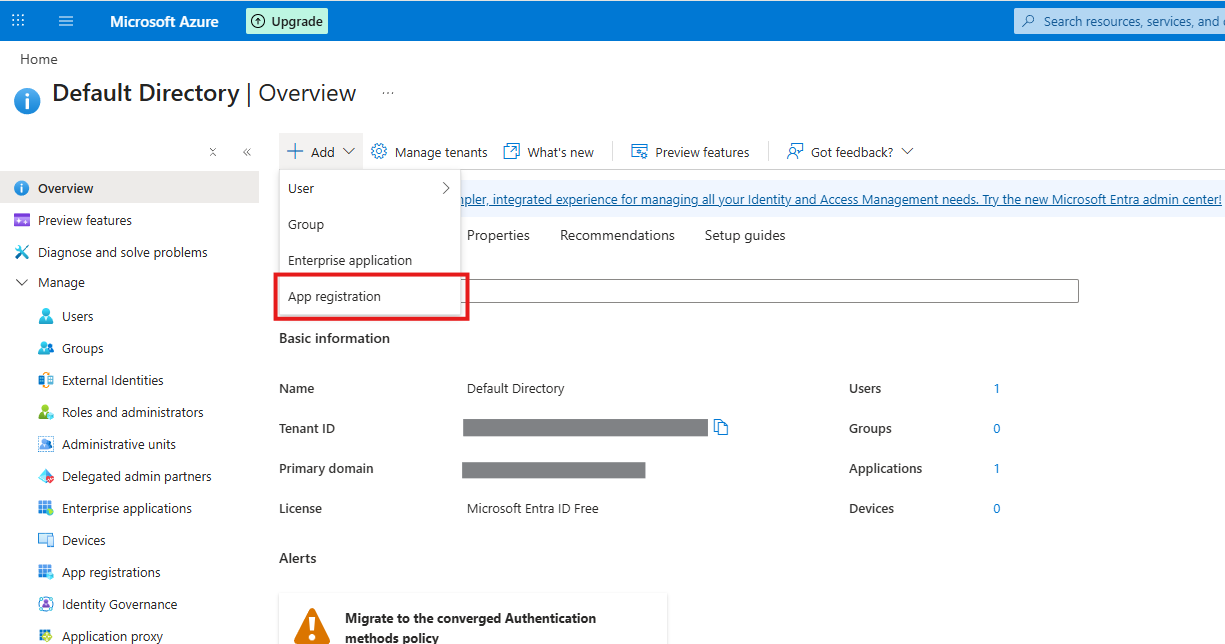
- Press Add → App registration.
<figure><img src="https://content.gitbook.com/content/aEnaAl6e7qhRH1HWZmjS/blobs/5BWOcNSEeCI1vFrgx3QO/image.png" alt="App registration"></figure>
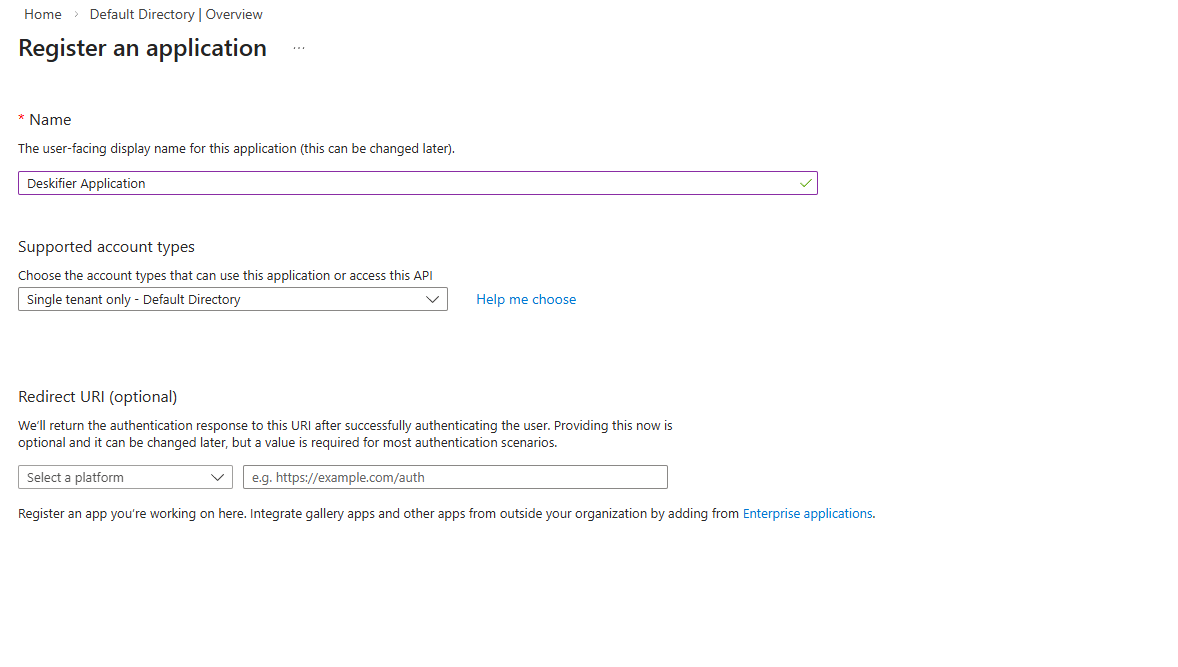
- Enter any name for your application.
<figure><img src="https://content.gitbook.com/content/aEnaAl6e7qhRH1HWZmjS/blobs/HtgHw2fmniHtugKN2cYu/image.png" alt="App registration name"></figure>
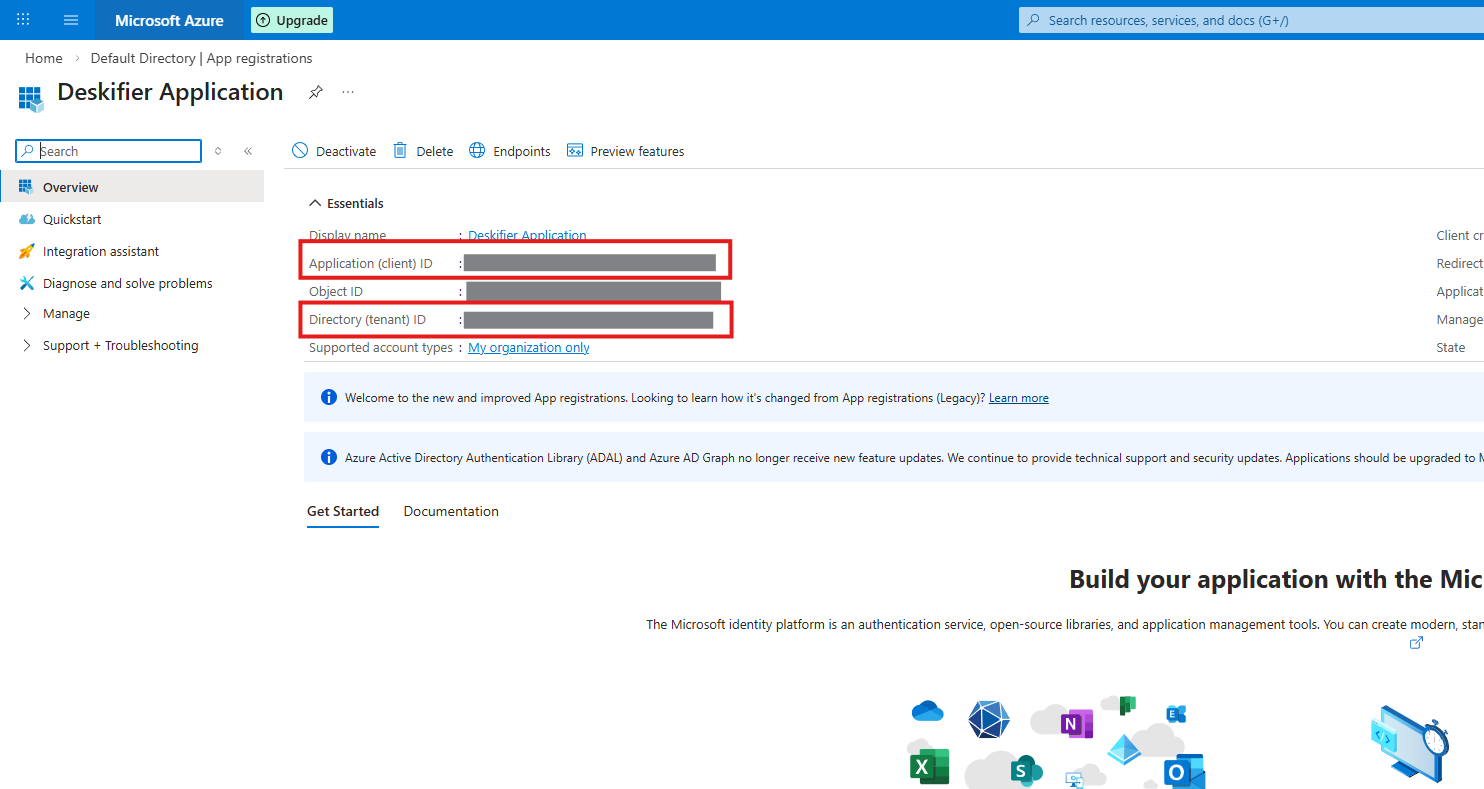
- Take note of these two values — you'll enter them into the Deskifier dashboard as Application Tenant ID & Application Client ID.
<figure><img src="https://content.gitbook.com/content/aEnaAl6e7qhRH1HWZmjS/blobs/nxgDTY7RLndfUR7oIlyA/image.png" alt="Tenant ID and Client ID"></figure>
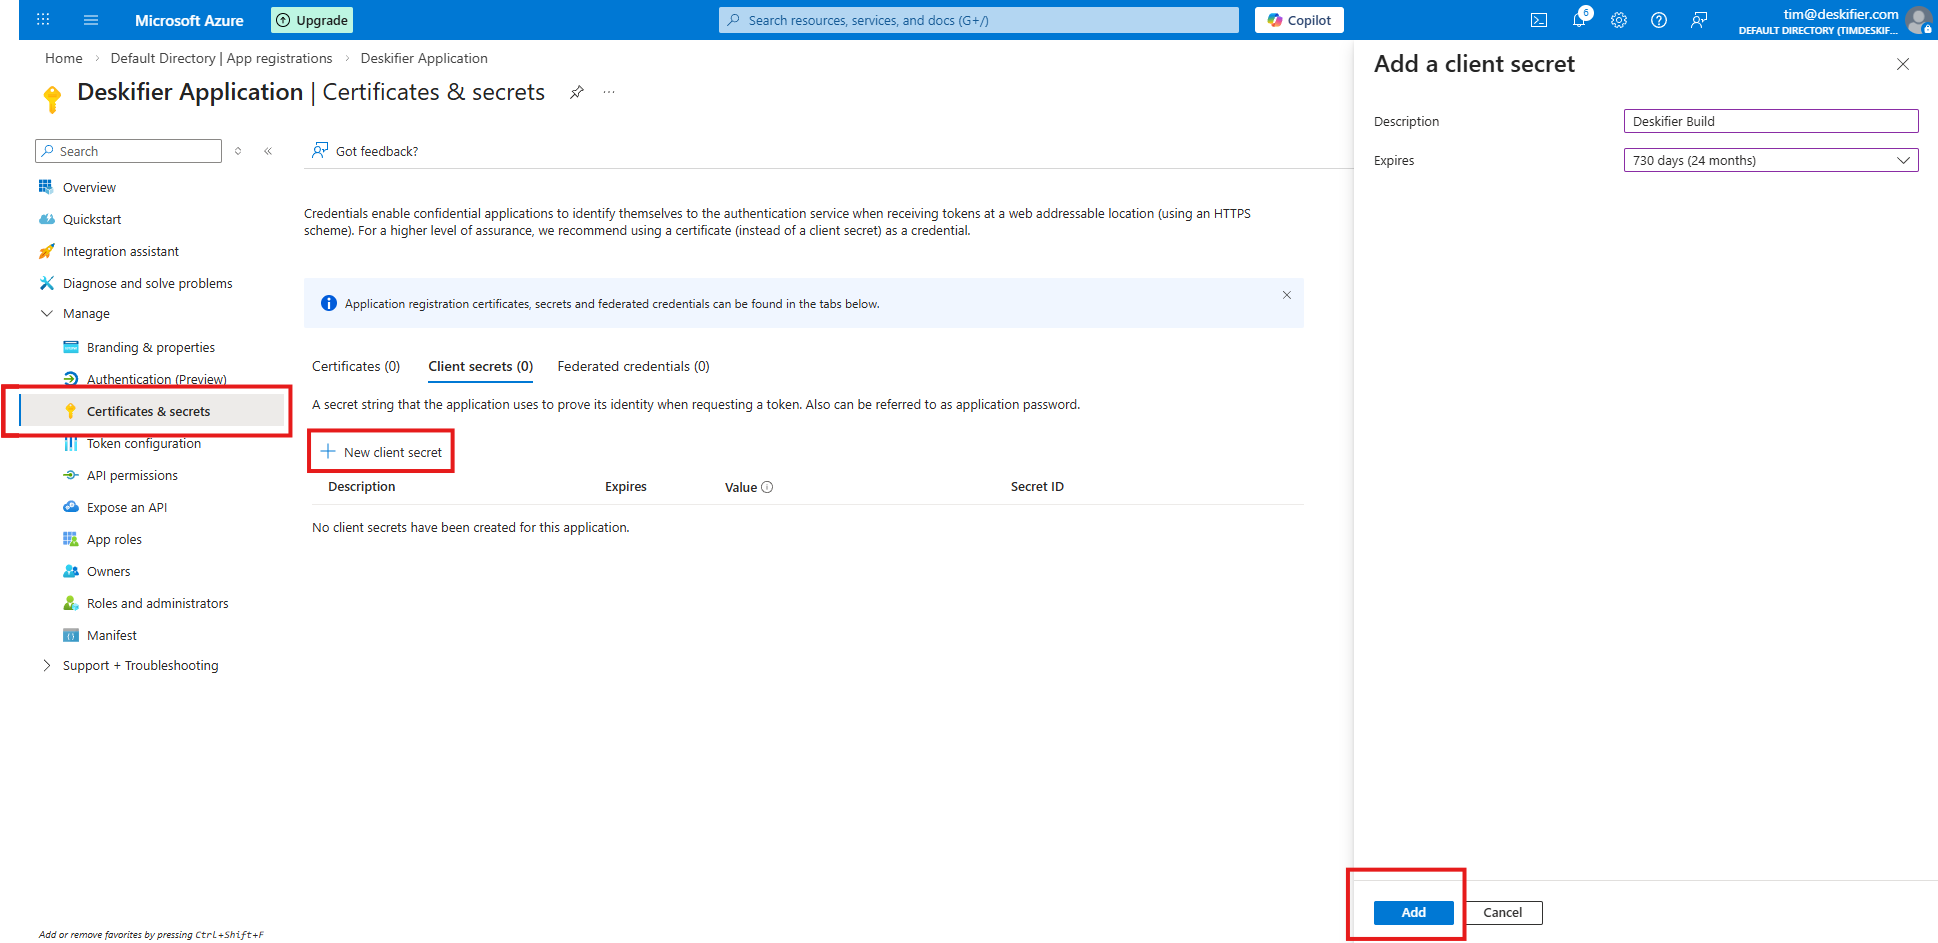
- Head to "Certificates & secrets" and click "New client secret". Enter a description and click Add.
<figure><img src="https://content.gitbook.com/content/aEnaAl6e7qhRH1HWZmjS/blobs/clbvPpEDy5xKacg6f7th/image.png" alt="New client secret"></figure>
- Take note of the Client secret value — you'll enter it as Application Client Secret.
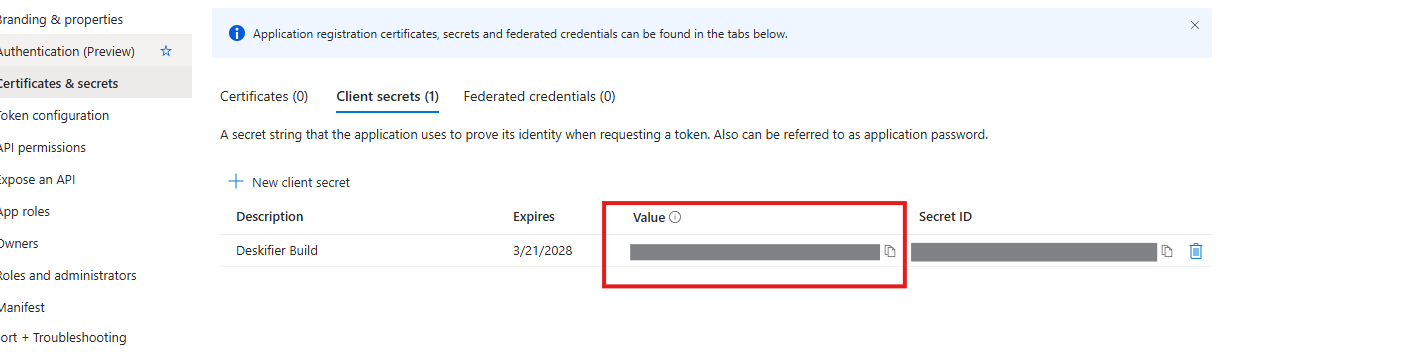
<figure><img src="https://content.gitbook.com/content/aEnaAl6e7qhRH1HWZmjS/blobs/A6AQpJD415bpR1I92iqH/image.png" alt="Client secret value"></figure>
- Head back to the Artifact Signing service, into Access control (IAM), and click "Add" again.
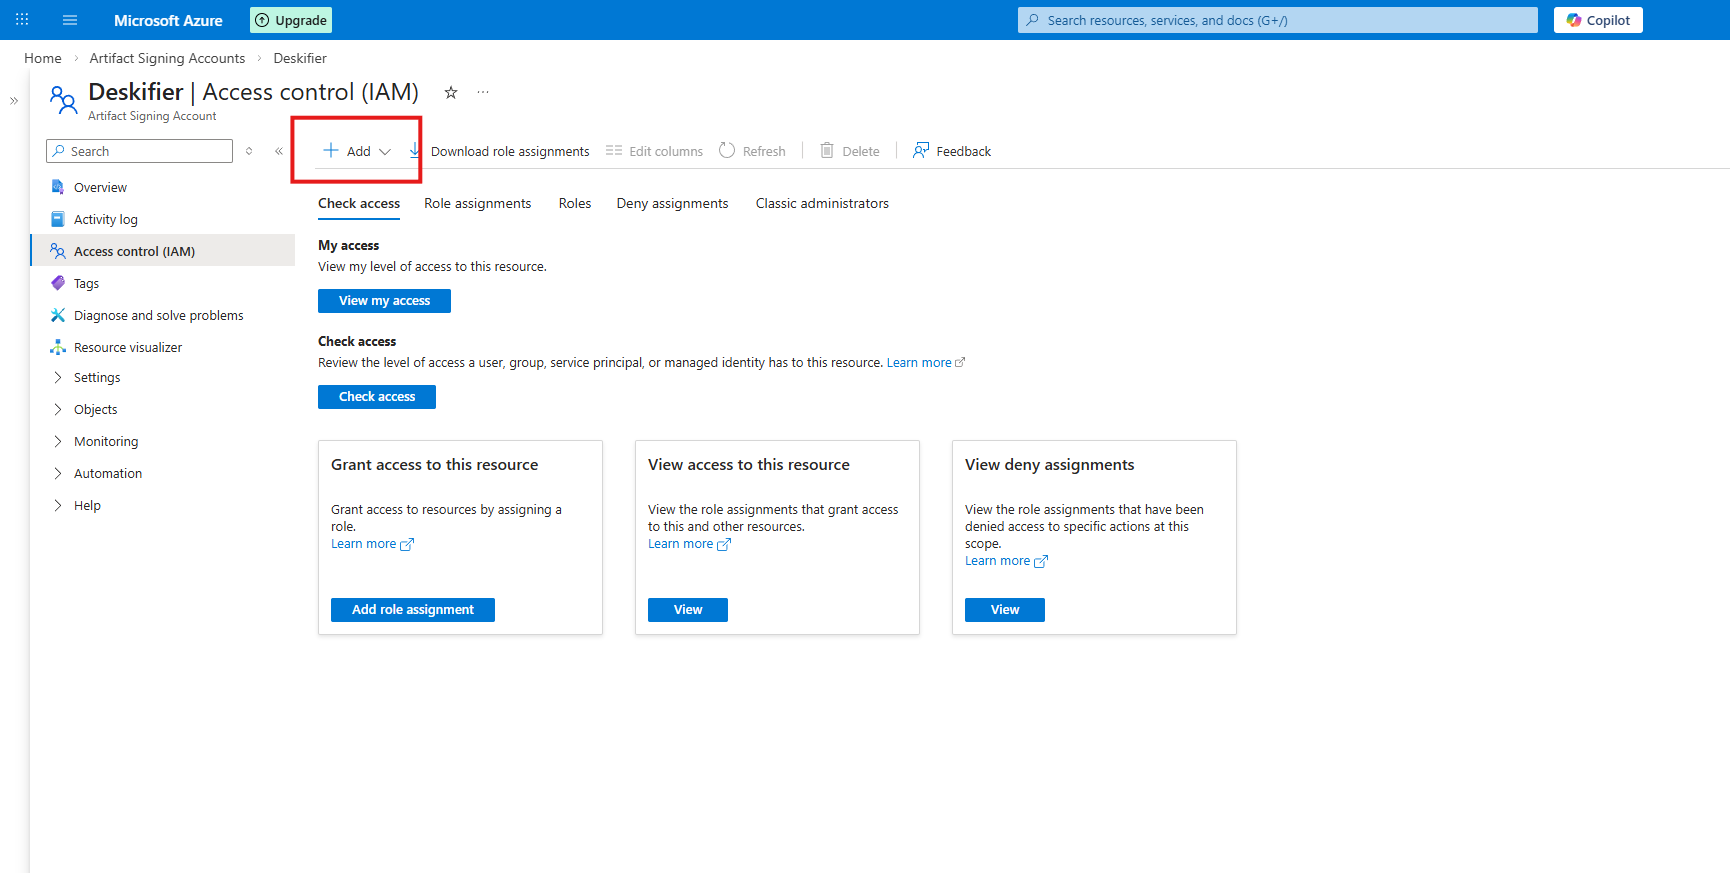
<figure><img src="https://content.gitbook.com/content/aEnaAl6e7qhRH1HWZmjS/blobs/0fE6DgJms6pUXyl7TTHm/image.png" alt="Add role assignment"></figure>
- Search "Artifact Signing Certificate Profile Signer" and select it.
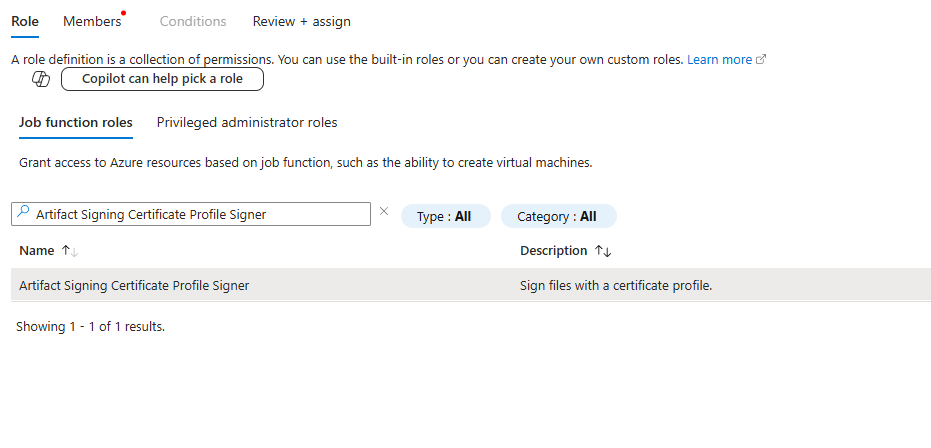
<figure><img src="https://content.gitbook.com/content/aEnaAl6e7qhRH1HWZmjS/blobs/iqOvoZRGs0rHmaNGYLjn/image.png" alt="Certificate Profile Signer role"></figure>
- Go to Select members, search your newly-created application, and assign it.
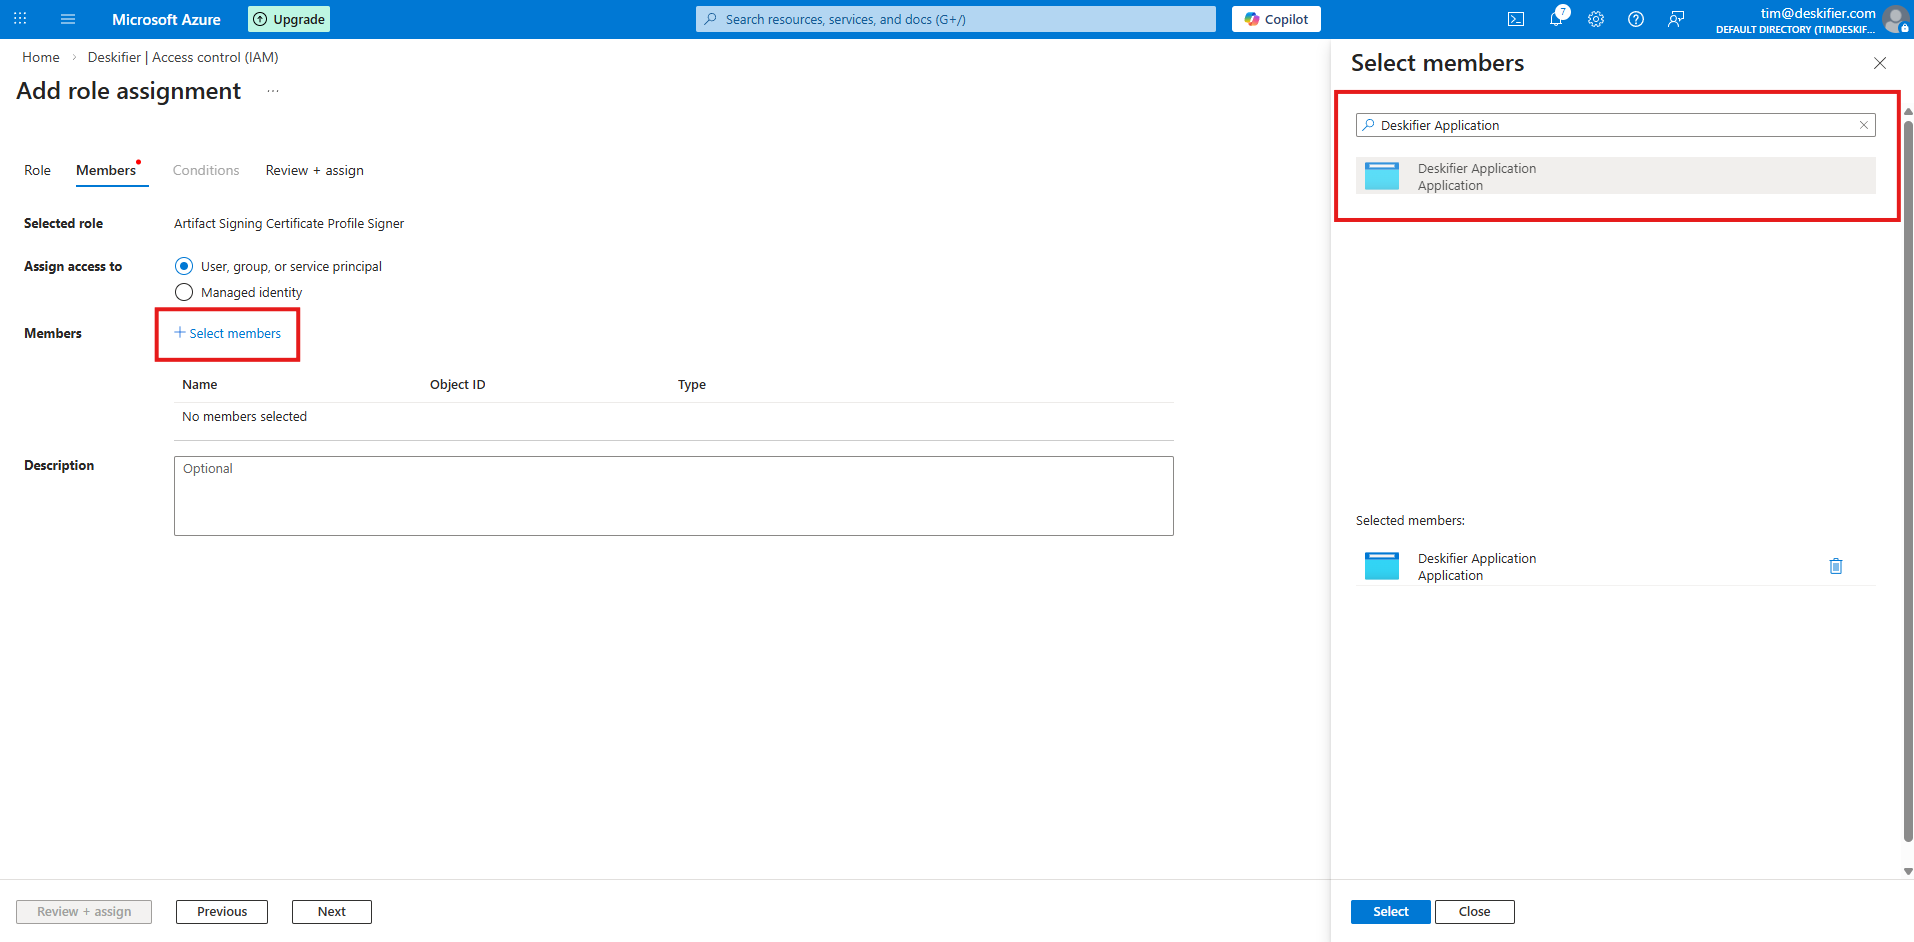
<figure><img src="https://content.gitbook.com/content/aEnaAl6e7qhRH1HWZmjS/blobs/ajMqr2DCq4auUiiqHj7n/image.png" alt="Assign role to application"></figure>
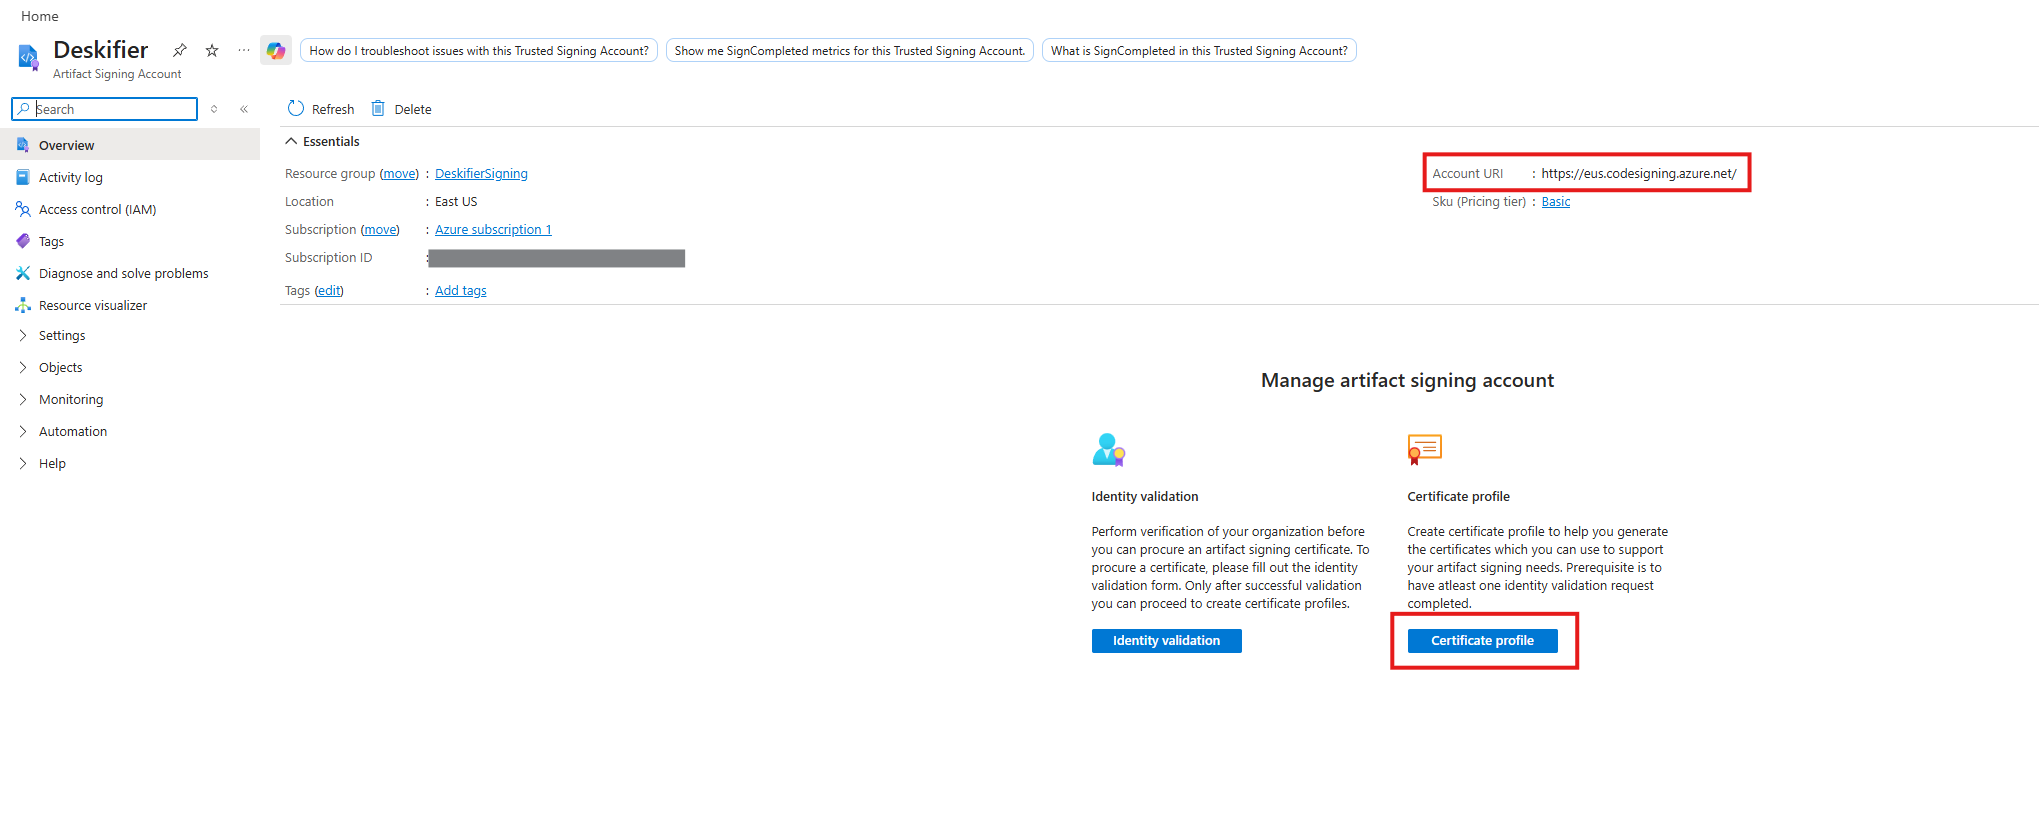
- Head back to Overview and click Certificate profile. Take note of the account URI — you'll enter it as Azure Signing Endpoint.
The next section assumes that your Identity validation from step 10 is complete.
<figure><img src="https://content.gitbook.com/content/aEnaAl6e7qhRH1HWZmjS/blobs/W3J1Vj4Zo9qMSEJm6qrM/Screenshot%202026-03-22%20014721.png" alt="Certificate profile"></figure>
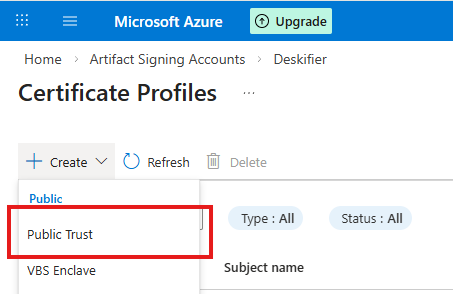
- Click Create → Public Trust.
<figure><img src="https://content.gitbook.com/content/aEnaAl6e7qhRH1HWZmjS/blobs/IMnpGD7OnTRBSM5l2hRd/image.png" alt="Create Public Trust"></figure>
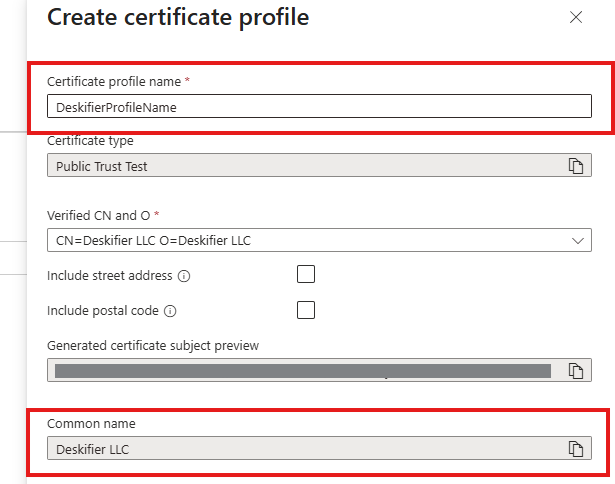
- Enter a Certificate Profile Name and select your identity. Take note of your Certificate Profile Name & Common Name — you'll enter them as Azure Certificate Profile Name & Azure Signing Publisher Name.
<figure><img src="https://content.gitbook.com/content/aEnaAl6e7qhRH1HWZmjS/blobs/Nd8VAYj4qD25nOdfYl3y/image.png" alt="Certificate Profile Name"></figure>
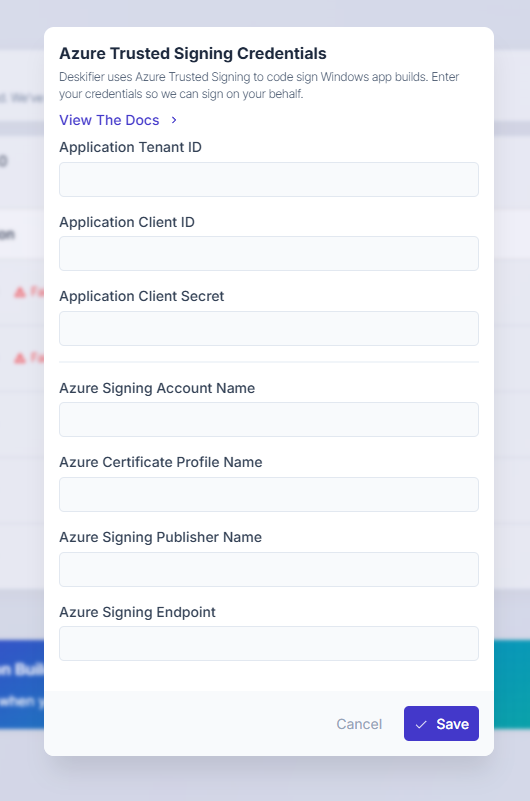
You should now have all the values Deskifier needs.
<figure><img src="https://content.gitbook.com/content/aEnaAl6e7qhRH1HWZmjS/blobs/H4wL1lBWspb9orJxBsau/image.png" alt="Azure signing dashboard fields"></figure>
Where each value goes
| Deskifier field | From step |
|---|---|
| Application Tenant ID & Application Client ID | 14 |
| Application Client Secret | 16 |
| Azure Signing Account Name | 4 |
| Azure Certificate Profile Name & Azure Signing Publisher | 22 |
| Azure Signing Endpoint | 20 |